Exercises
- Deadline
- 👥 Team
- Introduction
- Install evo
- Downloading the dataset
- Confirm Docker Engine is Installed
- Setting up your repository
- Building Docker Images
- Running ORB-SLAM3
- Running Kimera
- Fixing the timestamps
- 📨 Deliverable 1 - Performance Comparison [60 pts]
- 📨 [Optional] Deliverable 2 - LDSO [+10 pts]
- Summary of Team Deliverables
- [Optional] Provide feedback (Extra credit: 3 pts)
Deadline
The VNAV staff will clone your repository on November 13th at 1pm EST. Since this is lab9.5, there are no Individual questions (since you did them as lab9).
👥 Team
Introduction
Purpose: Process a dataset with two separate SLAM pipelines and compare their predicted trajectories.
For this assignment, we will be evaluating two open source SLAM systems:
- ORB-SLAM3: an updated (modern) version of the system described in the original ORB-SLAM paper (paper, GitHub).
- Kimera-VIO: a Visual Inertial Odometry pipeline for accurate State Estimation from Stereo + IMU data produced by MIT SPARK lab (i.e., Luca’s lab) (paper, GitHub).
For a fair comparison, we will evaluate both systems on the same input data. Specifically, we will be using MH_01_easy, a sequence of the popular EuRoC dataset (paper, webpage). To get a feel for what this sequence looks like, checkout a video here.
After we process the dataset with both systems, we will compare their trajectory estimates using evo, a python toolbox for comparing and evaluating the quality of trajectory estimates.
Install evo
- Install
evowith:pip install evo - Confirm
evoinstalled correctly by runningevoon your command-line. If everything is working, should expect to see something like this:
$ evo
Initialized new /home/vnav/.evo/settings.json
usage: evo [-h] {pkg,cat_log} ...

(c) evo authors - license: run 'evo pkg --license'
More docs are available at: github.com/MichaelGrupp/evo/wiki

Python package for the evaluation of odometry and SLAM

Supported trajectory formats:
* TUM trajectory files
* KITTI pose files
* ROS and ROS2 bagfile with geometry_msgs/PoseStamped,
    geometry_msgs/TransformStamped, geometry_msgs/PoseWithCovarianceStamped,
    geometry_msgs/PointStamped, nav_msgs/Odometry topics or TF messages
* EuRoC MAV dataset groundtruth files

The following executables are available:

Metrics:
   evo_ape - absolute pose error
   evo_rpe - relative pose error

Tools:
   evo_traj - tool for analyzing, plotting or exporting multiple trajectories
   evo_res - tool for processing multiple result files from the metrics
   evo_ipython - IPython shell with pre-loaded evo modules
   evo_fig - (experimental) tool for re-opening serialized plots
   evo_config - tool for global settings and config file manipulation
Note: Check out evo’s documentation (i.e., its README and wiki) to learn how to use it..
Downloading the dataset
- Download
lab9_data.tar.gz(~1.46GB) from here. - Assuming you downloaded the
lab9_data.tar.gzto~/Downloads, run the following commands to (i) ensure you have~/vnav/dataand (ii) movelab9_data.tar.gzto the correct folder:mkdir -p ~/vnav/data mv ~/Download/lab9_data.tar.gz ~/vnav/data - Navigate to the folder
~/vnav/dataand extract the dataset:cd ~/vnav/data tar xzvf lab9_data.tar.gz - Confirm the data extracted and the following directory structure exists:
~/vnav/data/MH_01_easy
└── mav0
 ├── body.yaml
 ├── cam0
 │   ├── data
 │   │   └── ... (.png files)
 │   ├── data.csv
 │   └── sensor.yaml
 ├── cam1
 │   ├── data
 │   │   └── ... (.png files)
 │   ├── data.csv
 │   └── sensor.yaml
 ├── imu0
 │   ├── data.csv
 │   └── sensor.yaml
 ├── leica0
 │   ├── data.csv
 │   └── sensor.yaml
 └── state_groundtruth_estimate0
     ├── data.csv
     └── sensor.yaml
Note: If you’re interested, you can access the full dataset on Google Drive here.
Confirm Docker Engine is Installed
You should have already done this as lab8 - Deliverable 2, if not go back to that lab and follow those instructions.
Setting up your repository
- Update the starter code repo:
cd ~/vnav/starter-code git pull - Copy relevant starter code to your team-submissions repo:
cp -r ~/vnav/starter-code/lab9 ~/vnav/team-submissions - Navigate directly to
~/vnav/team-submissions/lab9:cd ~/vnav/team-submissions/lab9Note: This lab is a little different than previous assignments – you will not be directly building any ROS2 code, so you do NOT need to link this folder to your
~/vnav/wsfolder in any way. Instead you will be working directly in this folder for this assignment.
Building Docker Images
Building Containers
The next steps will take a while (each docker image will take at least 10+ minutes to build)! Do NOT try and build both containers at once!
First, we’ll build ORB_SLAM3:
cd ~/vnav/team-submissions/lab9
docker build -f- -t orbslam:latest . < Dockerfile_ORBSLAM3
Next, we’ll build Kimera:
cd ~/vnav/team-submissions/lab9
docker build -f- -t kimera:latest . < Dockerfile_KIMERA
Note: If you didn’t setup your docker install group permissions, you might need to include a sudo before the docker build commands.
Running ORB-SLAM3
You can run ORB-SLAM3 via
./run_docker.sh orbslam:latest
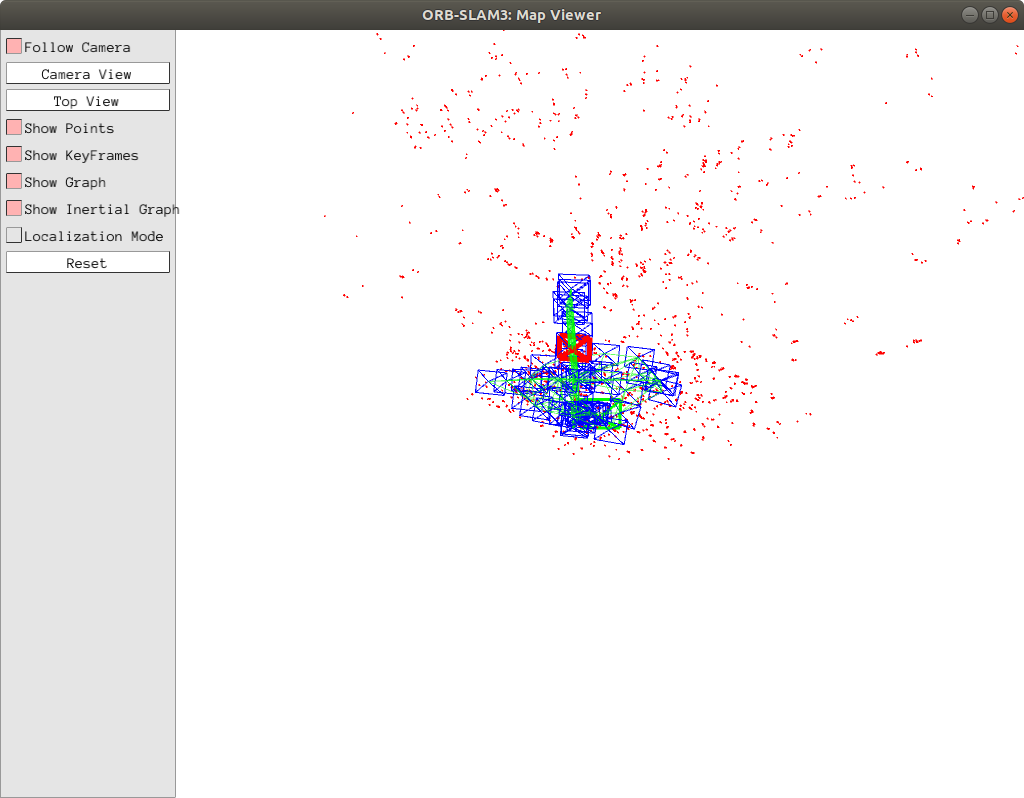
You should see something like this:

Wait for ORB-SLAM3 to finish running the entire sequence (it will exit automatically when finished). You should now see a file named CameraTrajectory.txt under output/orbslam.
Running Kimera
You can run Kimera via
./run_docker.sh kimera:latest
You should see something like this:

Wait for Kimera to finish running the entire sequence (it will exit automatically when finished). You should now see several files under output/kimera. We specifically care about output/kimera/traj_vio.csv.
Fixing the timestamps
ORB-SLAM3 and Kimera use slightly different data formats. We have provided you with a script, fix_timestamps.py that will correct this. (Specifically, the script converts the ORB-SLAM3 timestamps to nanoseconds, and converts the Kimera-VIO trajectory to the right format.)
After you have run both SLAM pipelines, you can run this script with the following command:
python fix_timestamps.py
📨 Deliverable 1 - Performance Comparison [60 pts]
Using the workflow above, we are going to ask you address the following questions in a PDF (named results.pdf). Make sure you commit the full lab9 folder to your team-submissions repository. Make sure to confirm you have committed the following components:
- The starter code (including any modifications you may have made)
- Your
results.pdf - The
outputfolder with your produced SLAM trajectories
Running the MH_01_easy Sequence
You will not receive full credit unless you run Kimera and ORB-SLAM3 against the full MH_01_easy sequence. Make sure you don't terminate it early!
- Process the trajectories using the above workflow. Results should appear in the
outputfolder. - Use the
evo_trajtool to plot both trajectories forMH_01_easy. Add this plot to yourresults.pdfand comment on the differences that you see between trajectories:evo_traj tum output/kimera/kimera.txt output/orbslam/orb_slam3.txt --plot - Convert the ground-truth trajectory for the
MH_01_easysequence to the “right format”, and plot the result. Specifically, to compare the ground-truth pose data from the EuRoC dataset, we need to fix the pose alignment (see note below).evo_traj euroc ~/datasets/vnav/MH_01_easy/mav0/state_groundtruth_estimate0/data.csv --save_as_tum evo_traj tum output/kimera/kimera.txt output/orbslam/orb_slam3.txt --ref data.tum --plot --alignAdd this plot to
results.pdfand comment on the differences that you see between trajectories.
Note: In general, different SLAM systems may use different conventions for the world frame, so we have to align the trajectories in order to compare them. This amounts to solving for the optimal (in the sense of having the “best fit” to the ground truth) $\SE{3}$ transformation of the estimated trajectory. Fortunately, tools like evo provide implementations that do this for us, so we’re not going to ask you to implement the alignment process in this lab.
📨 [Optional] Deliverable 2 - LDSO [+10 pts]
Based on LSD-SLAM, LDSO is a direct (and sparse) formulation for SLAM. It can also handle loop closures (a limitation of the original LSD-SLAM).
Install the code for LDSO by following the Readme.md in the GitHub repository.
In the same Readme.md there is an example on how to run this pipeline for the EuRoC dataset:
cd ~/path/to/LDSO
./bin/run_dso_euroc preset=0 files=$HOME/vnav/data/MH_01_easy/mav0/cam0
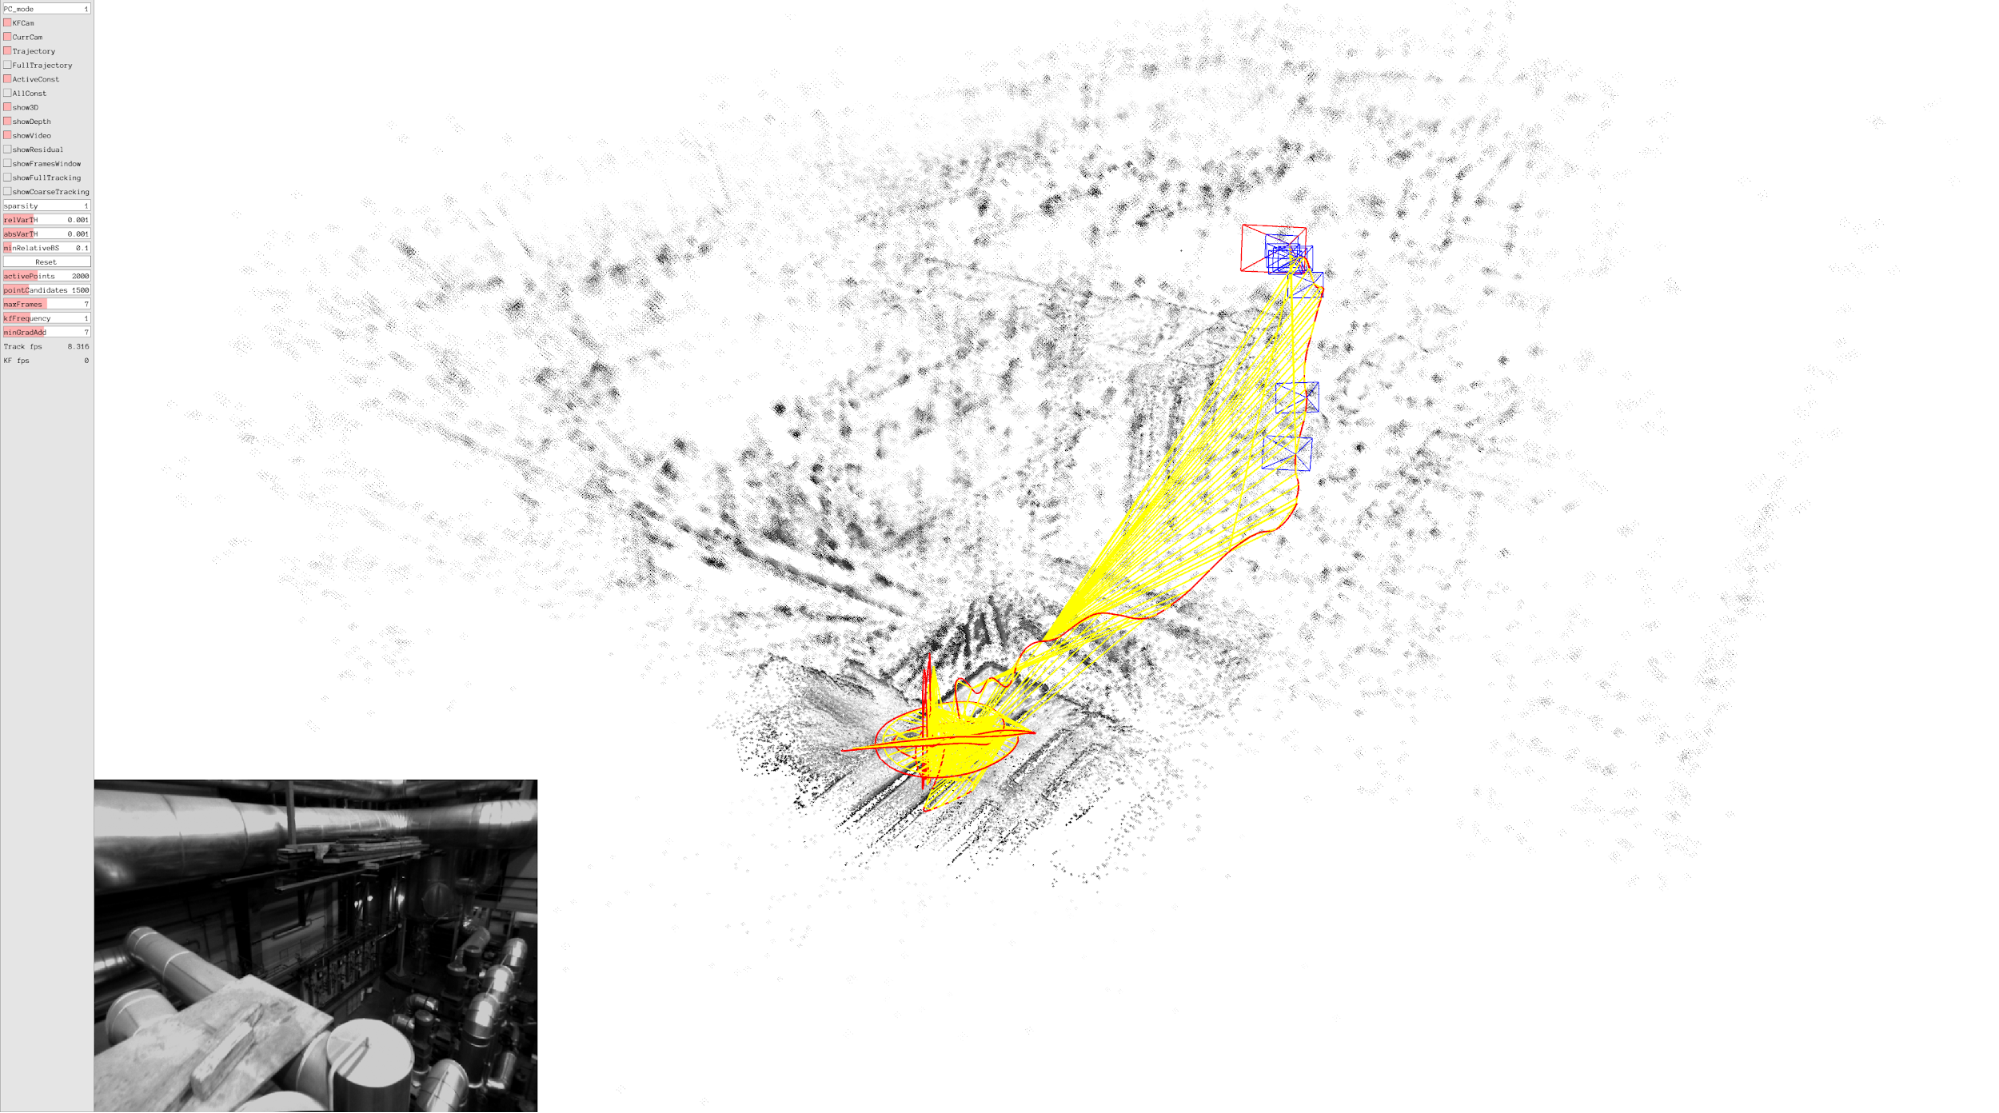
At this point, you should be able to see the following window:

LDSO will by default output the results in results.txt in the same folder where you ran the command. You can also specify the output folder by setting the output flag when running DSO. The results file will only be generated once the sequence has been processed.
Note that the output from LDSO might be formatted incorrectly (e.g., spurious backspaces).
Plot the trajectory produced by LDSO with the trajectories from Kimera and ORB-SLAM3. Briefly comment on any differences in the trajectories.
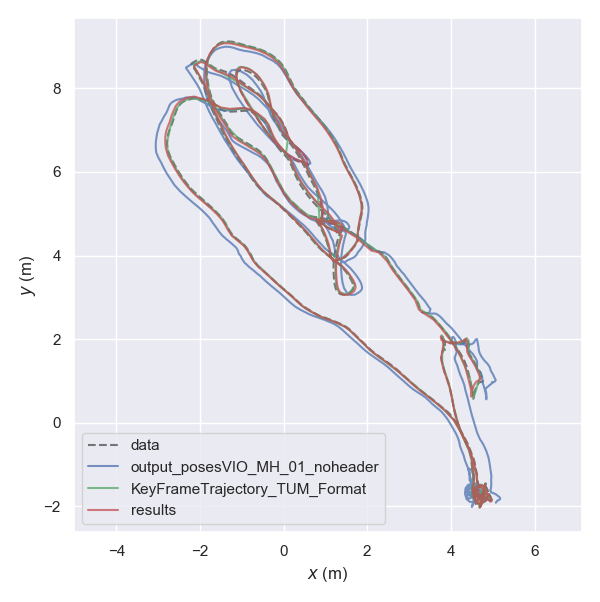
Note that LDSO is a monocular method and there is no way of recovering the true scale of the scene. You will want to use the --correct_scale flag for evo to estimate not just the $\SE{3}$ alignment of the predicted trajectory to the ground-truth trajectory, but also the global scale factor.
Here’s an example of the aligned trajectories plotted in the x-y plane (you can add the flag --plot_mode xy to compare with this plot):

Summary of Team Deliverables
- Comparison plots of Kimera and ORB-SLAM3 on
MH_01_easywith comments on differences in trajectories - Plot of Kimera and ORB-SLAM3 trajectories on
MH_01_easyaligned with ground-truth with comments on any differences in the trajectories - [Optional] Plot of Kimera + ORB-SLAM3 + LDSO (aligned and scale corrected with ground-truth) with comments on any differences in trajectories
[Optional] Provide feedback (Extra credit: 3 pts)
This assignment involved a lot of code rewriting, so it is possible something is confusing or unclear. We want your feedback so we can improve this assignment (and the class overall) for future offerings. If you provide actionable feedback to the Google Form link, you can get up to 3 pts of extra credit. Feedback can be positive, negative, or something in between – the important thing is your feedback is actionable (i.e., “I did’t like X” is vague, hard to address, and thus not actionable).
The Google Form is pinned in the course Piazza (we do not want to post the link publically, which is why it is not provided here).
Note that we cannot give extra points for anonymous feedback while maintaining your anonymity. That being said, you are still encouraged to provide anonymous feedback if you’d like!